Showing posts with label Paper Trey. Show all posts

Monday, November 25, 2013

PTI PAPER HOUSE BLOG HOP


Hola / Hello!

Les muestro mi participación en el blog hop de Paper Trey Ink para este mes.  El mismo se trata de preparar una casita en papel.  A mi me encantan las casitas así que cuando vi el tema prontamente me decidí a participar del reto.

Today I am sharing a project I made for the the november blog hop a PTI.  When I saw the theme I was fascinated since I love all types of paper houses.


Para la cajita usé el set Door to Door from PTI y el Santa's Village kit de SVG Cuts. El set de sellos me encanta por todas las imágenes que tiene que reultan ser perfectas para hacer estas cajitas.

To make my house I used the set Door to Door and the Santa's Village kit from SVG Cuts.  I love this stamp set because it has tons of images one can use to create these little houses as well as use them on cards.

Aquí tienen varios detalles de los lados y la parte trasera de la casita. 
 Here are some details of the sides and back of the little house.


Aqui tienen la cajita abierta.  /  Here is the open box


Y finalmente la casita completa  /  And finally the full house.


Here is the recipe I used:

Digital file:

Papers:

American Craft cardstock - Kraft
DCWV - Jolly Whimsy stack

Stamps:

and matching die 


Other:
Ribbon from my stash
White pearl strings
Rhinestones
Copics markers
Stickles - Crystal color

Lots of love!!

I hope you have a great day and the opportunity to play in the blog hop.

Hugs!!

Friday, October 25, 2013

TAGS AND MORE TAGS #3

[untitled%255B2%255D.png]

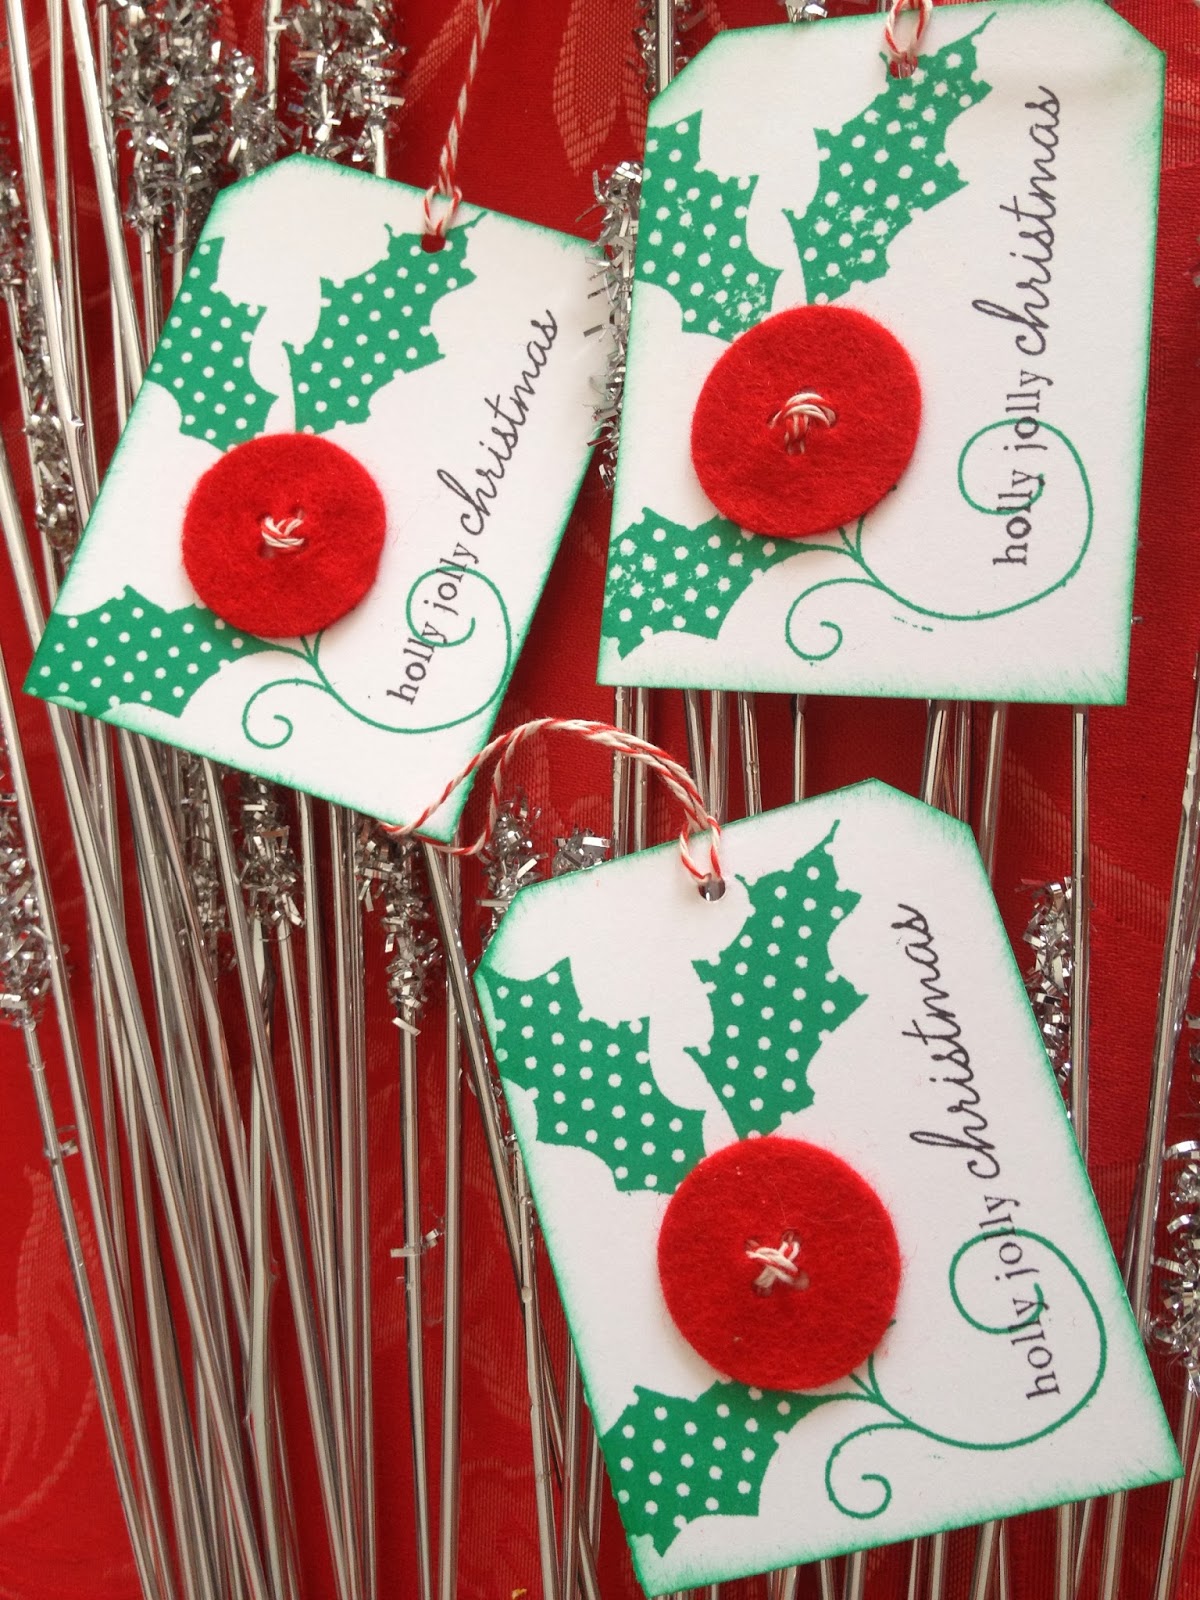
This is my last post for today.  For the next sets I used the Love Lives Here Holiday Stamp Set.


And these last sets were made using the Holiday Button Bits Stamp Set.  The Buttons were cut in white felt using the PTI Buttons die.


I am really glad for this challenge.  In total I made around 80 tags which will be more than enough to prepare all the Holiday Kits I will be giving away this season.  Now I only need to make the gift boxes.  

I hope you liked all my tags.

Hugs,
Joan

Wednesday, November 9, 2011

CELEBRATE THE MAGIC

Hi!!

I am still working on building my stash of holiday cards.  I want to show you today the second card I made inspired on Jennifer's first day tutorial.  I am making a bunch of these cute stars in different sizes.  I really love how they look.

For this class I decided to use mostly my stash of holiday papers, which is a LOT of DP ;) For this card I am using an old Stampin Up holiday DP.  After giving shape to my star, I applied a coat of Liquid Laminate to add some shine.  Also, I find that this coat gives the star more stability since the DP I used is very thin.  I also add a rhinestone to the centers of the stars and clored them with a yellow Copic.


I am making three cards of each design which is really helping me build my stash for the Holidays.  I need to make not only for myself, but for all the family and friends that comes to my house asking for "their cards" LOL!

Right now I am finishing a Photo Card ;)  BTW, have you watched today's class? It's amazing!!!

Hope you have a great day!!

Tuesday, July 5, 2011

THANKS A MELON


Hola!

Les presento la tarjetita que hice ayer para el campamento de verano.  La combinación de esta semana también me encanta porque es con colores bien alegres y brillantes.  Espero que les guste!!

Hi!

Today I show you the card I made for this week color combo at the Summer Card Camp.  I love this week combo too since it has a lot of bright colors.


Que tengan un  feliz día!  /  Hope you have a great day!!


Thursday, June 30, 2011

ALL ABOUT BALANCE


Hoy en el campamento se habló del balance. Aquí una tarjetita que hice rapidito con el estilo asimétrico. Estoy en el proceso de terminar un set de tarjetitas con el estilo simétrico así que espero para mañana compartirlo con ustedes.

Que tengan buen día!!

Today class was about balance. Here is a simple card I made using the Asymmetrical (Informal) Balance. I’m finishing a mini cards set using the symmetrical style. I hope to share it with you tomorrow.

Have a great day!

Friday, June 24, 2011

FOR 50 YEARS OF HAPPILY EVER AFTER


Hola,

La tarjeta de hoy tiene un significado bien especial pues la misma es para celebrar que mis dos viejitos cumplen nada más y nada menos que 50 años de estar juntos y felizmente casados. La clave de su éxito no ha sido la ausencia de conflictos y diferencias sino la forma en que decidieron actuar ante las mismas. De esos 50 años yo he tenido la bendición de estar en sus vidas por 43 (que cumpliré el próximo mes) y me siento más que bendecida por los padres que Dios me dio. Durante mi vida los he visto superar sus conflictos con respeto el uno hacia el otro y al final siempre terminábamos riendo por las diferentes situaciones. Los he visto estar juntos en abundancia y escasez y eso nos enseño a vivir contentos no importa las circunstancias. Hoy celebramos 50 años de triunfos, aunque todos los días celebro tener a esas dos grandes personas en mi vida.

Aquí les dejo una canción de Kenny Rogers que describe perfectamente la vida de mis padres. Cada vez que la escucho no dejo de pensar en ellos y de sentir gran orgullo y agradecimiento.

Besitos.

Today’s card has a special meaning because it’s to celebrate that my parent’s are celebrating their 50th weeding anniversary. Of those I have been part of their lives for 43 years and feel more than blessed for the parents God gave me. I have seen them overcome their conflicts with respect and love. As a family we’ve have abundance and scarcity and that has taught us to be happy no matter the circumstances. Today we celebrate 50 years of love and triumphs although I celebrate them every single day of my life.

Here I include a song by Kenny Rogers which perfectly describes the story of my parents. Every time I hear it I think of them and feel pride and profound gratitude.

Have a great day!


PD. Esta no es la tarjeta oficial, pero mi mamá mira mi blog y no puedo arruinar el factor sorpresa ;) / This not their official card but mommy visits my blog and I can't ruin the surprise ;)

Monday, June 13, 2011

I'M HERE FOR YOU


Buen día!!

Espero que hayan pasado un buen fin de semana. Yo estuve descansando mucho y practicando una técnica que hace tiempo estaba loca por hacer. Les presento esta tarjetita que pinté usando los “Distress Inks”. Hacen varios días estuve viendo los videos de Lily Pad Cards y a la verdad es que me encantó la forma en que ella utiliza estas tintas para darle color a sus tarjetas. Ayer en la tarde me dediqué a practicar y aquí les presento el resultado.

Aprovecho la oportunidad para presentar la tarjeta en el reto de Magical Monday – Pick Two. Los dos ingredientes que usé son flores y cinta.


Hi!

Hope you had a great weekend. I rested a lot and practiced a technique I have been wanting to try for a while. I colored this card using my Distress Inks. I love the technique videos from Lily Pad Cards and always enjoy the bright colors and the results of her cards.

I present this card on today’s Magical Monday – Pick Two challenge. I used flowers and ribbon.


Recipe:

Paper Trey Ink Stamps: Woodgrain Background, Think Big Favorites #4 and Year of Flowers, Sweet Peas.

Neenah cardstock

Distress Inks: Peeled Paint, Old Olive, Worn Lipstick, Fired Brick, Barn Door, Broken China, Tumbled Glass and Spiced Marmalade.

Versamark Ink.

White ribbon from my stash colored with Broken china.

Misc. Button, White embossing powder, home made daubers.


Tuesday, June 7, 2011

DYSU #22 ORANGE CHALLENGE

HEY THERE!!


Hola,

Les presento esta tarjetita que hice para los retos de DYSU # 22 Orange y el reto del sketch de junio 2011 en I Heart to stamps. Para la tarjeta utilicé el SVG file Balloon Craze de Lettering Delights.

Espero que les guste!

Hi,

Today’s card was made to be presented on the DYSU # 22 Orange and the June sketch for you to try I Heart To Stamp challenges. I used the SVG file Balloon Craze from Lettering Delights.

I hope you like my card!!


Recipe:

DCWV card base in yellow

DP paper from BG Ambrosia Collection

PTI Up UP & away (fro the clouds) and the sentiment from Paper Smooches Sentiment Sampler set.

SVG file Balloon Craze de Lettering Delights.

Gel pens in black & white

Misc buttons and beads from my stash

Tuesday, April 19, 2011

FLOWERS AND BUTTONS

Hola!

Hoy les muestro este set de tarjetas que preparé hacen días para regalarle a mi hermana en su cumpleaños. Me gusto mucho porque el negro hace que los colores resalten y se vean más brillantes. Las tarjetas no tienen sentimiento porque mi hermana las prefiere en blanco para poderlas usar en cualquier ocasión. Lo más que me gusta de regalar tarjetas hechas por mi es que siempre la reacción de la persona que las recibe me llena de satisfacción. Lo malo es que invariablemente me dicen que no las van a usar porque son tan lindas que se le acaban. ¿Alguna vez te ha pasado eso? Bueno, a mi me pasa a menudo…

Hi!

Today I want to show you a card set I made for my sister. It was very easy to put together and love how the black makes the colors pop out. They don’t have any sentiment since my sister prefers them in blank so she can use them for any occasion. I love to give hand made cards; they always put a smile on the person receiving them. The bad thing is that they always tell me that my cards are not to be used because they are so beautiful LOL!

Para empacar el set utilicé una de las cajas donde vienen los stamps de Paper Trey. A mi estos sellos me encantan no solo por lo bellos que son, sino porque su empaque está lleno de posibilidades.

The set is wrapped in a Paper Trey box. I love to buy these stamps not only because they are really pretty but also because their packaging is full of possibilities.

Usé papel de computadora para hacer los sobres y los decoré con stamps y tintas en los mismos colores de las tarjetas.

I used computer papaer to make the envelopes and decorated them wit stamps and ink in the same colors I used for the cards.


Espero que tengan un lindo día.

Hope you have a wonderful day.


Recipe:

Neenah white cardstock

AC Cardstock in varipus colors

PT stamp set Polka Dots Basics II and Blooming Button Bits

Transparent buttons

Black Gel Pen

Computer paper to make the envelopes

A PT stamp Box packaging and tissue paper

Friday, April 15, 2011

THE GIFT WRAP CHALLENGE

Hola,

Hoy les muestro este set de cajita con su tarjeta que hice para un regalito. Me encanto el resultado y me alegre que a mi hermana le gustara también.

Today I want to show you this gift wrapping set I made for my sister. Yesterday we celebrated her birthday and I wanted to give her something special… I loved how it turned out and it makes me happy that she liked the gift too.

El borde de esta circulo lo hice con “tissue paper”. Lo estampé en anaranjado usando un stamps de Paper Trey y le hice los cortecitos con una tijera. Luego adherí el papel al circulo y recorte el borde para que se viera uniforme.

I made the ruffled border in the circle with white tissue paper. I stamped the paper in orange and make lot of slits with a fringe scissor, then glued the strip of paper to the circle and trimmed off the excess.

Me encanta este pajarito de Paper Smooches…. Bello!!!

I love this little bird from Paper Smooches… so cute!!

El sobre en realidad es una bolsita que decore, tenia deseos de hacer algo diferente al sobre tradicional.

The envelope is a glassine bag. I just wanted something different than the traditional envelope.


Y esta es la cajita…. Bella!! La corté utilizando un file de SVG Cuts. Súper sencilla de hacer y en verdad el resultado me encanto…

And this is the super cute little box. I cut it using a file from SVG Cuts. It’s super easy to do and the results are stunnig!!


Mañana les tengo otro set de tarjetas. Estas pasadas semanas me he dedicado a preparar sets de tarjetas y en verdad es súper divertido. Si te decides participar de los retos en el blog Moxie Fab World ten cuidado porque te aseguro que son adictivos.

Tomorrow I will show you another card set. This last weeks I committed myself to make card sets every time I had a chance and it has been very relaxing. If you decide to participate in the Moxie Fab World challenge, be careful…it can be addictive.

Que tengan un bello dia!!

Have a great day


Recipe:

Love

PT Background Basics Gingham

Paper Smooches Birthday Buddies

White Tissue Paper

Ink in Orange and brown

SU Natural White cardstock.

DP paper My Minds eyes... can't remember the collection

Misc: Button from my stash, ribbon and twine

Thursday, April 14, 2011

COLORS AND BUTTERFLIES


Hoy les muestro un set de mini tarjetitas que hice para algún regalito que tenga que hacer de momento. También para continuar con la celebración de la edicion especial de Paper Crafts “350 Cards and Gifts” El set es súper sencillo de hacer, con mucho estampado como me gusta. Una buena oportunidad para utilizar los pedacitos de retazos de papel que guardamos y muchas veces no sabemos que hacer con ellos. Me inspire para este set en este set que se publico en la tarjeta de Cristina Kowalczyk, El set super sencillo y de verdad que me encanto desde que lo vi. Creo que ese ponchador va a subir en la escala de mi lista de deseos.

A parte de este set he estado ocupada en varios proyectos a la vez los cuales les mostrare pronto. Por el momento espero que pasen un lindo día y que hagan algo lindo y creativo hoy.


Today I want to show you a mini card set I made to continue the celebrations of the Paper Crafts issue “350 Cards and Gifts”. My set was inspired by this fabulous set from Cristina Kowalczyk. I loved how delicate it looks, also very simple to case. It was very easy to put together and the best part is that I got to use a lot of scraps… those little papers that get to our nerves but we simply can’t get rid of them…. Yeahhhh… you know what I’m talking about!!!

I also have been very busy with a lot of projects I will be showing you soon. Have a great day and I hope you can do something creative and beautiful today.


Besitos,

Joan


Recipe:

Love

PT stamp set Polka Dots Basic II

SU! cardstock in various colors

SU! Stamp set mini buttons

Nestability butterfly die

Sentiments from TAC

Saturday, March 5, 2011

A REJECTION WITH A TWIST ;)

Hice esta tarjeta para someterla a Paper Crafts asi que este viene a ser mi segundo rechazo. Pero la parte buena es que lo use para el reto del Tuesday Trigger en Moxie fab esta semana. Esta es una combinación de colores inusual en mi estilo, pero me encantó el resultado y lo alegre que se ve la tarjeta. La base en el sketch # 57.

This is my second reject. It's based on the sketch # 57. The coolest part is that I get to use it for this week Tuesday Trigger at Moxie Fab. Isn't it a great twist?? This is not a usual combination for me but I like the results and how bright and happy it looks.


Relevant facts / Datos relevantes:

1- I used brown flock for the flower center. / Utilize “flock” brown para el centro de la flor.
2-
I sponged the circle in brown. / Utilize la tecnica de sponging para el circulo brown.

Recipe:

Finished size: 4.25” Square

Technique: Paper Piecing and sponging.

Cardstock ; Stampinup.

Dies: Nestabilities, Circles and mini scallops circles

Ribbon: SU Chocolate Chip

Stamps: PT, Year of Flowers Daffodils and Backgrounds text style II.

Inks: Distress Inks in Antique Linen

Misc: Copics, Perfect Pearls from Ranger

Friday, March 4, 2011

Rejection Blog Hop


Hola!

Ayer luego de NO recibir un e-mail de Paper Crafts aceptando alguna de las tarjetas que sometí para una de sus ediciones especiales pasé por el blog de Amber y me encantó su idea. Ella es una chica súper alegre y talentosa que acabo de encontrar en el mudo de los blogs y quien decidió hacer un blog roll de rechazos. Me encanto la idea!! Después de todo de eso se trata, de crear, inspirar, y disfrutar de las cosas lindas de la vida.

Asi que les muestro mi primer rechazo. Preparé esta tarjeta inspirándome en el sketch #7. Pueden ver los 81 sketches >>aquí<<. Para la gente de Paper Crafts No debe ser nada fácil ese proceso de selección. Les llegaron sobre 2,700 tarjetas que tenían que verificar en menos de una semana. Aunque no escogieron ninguna de mis tarjetas, la experiencia me gusto mucho pues me motivó a ser más atrevida en el uso de mis materiales. Poco a poco les iré mostrando las 7 tarjetas que sometí. Pero por el momento este es el rechazo #1 que fue inspirado en el sketch #7.

Hi!

Yesterday after NOT finding any e-mail from Paper Crafts related to my cards submissions and pondering what to do next with my rejected cards, I went to Amber’s blog and found the greatest post of all. She started a rejection blog roll; I found the idea so great that I will start showing my rejections too. I feel proud to be able to participate in this blog roll, I learned during this process and challenged myself to work more organized and get out of my comfort zone. I am proud to show you my rejections since I made them to create, inspire, have fun and share life’s wonderful things.

So this is my first rejection. It’s based on the sketch # 7. You can see all 81 sketches in >>here<<.


Relevant facts / Datos relevantes:

1-I made the small flower with Polymer Clay. / Yo misma hice la florecita del medio con Polymer Clay.

2- I love this colors. / Me encantan esos colores!!

3- I almost never use a single layer in a card. / Casi nunca trabajo tarjetas sencillas de un solo layer.

4- I colored the rhinestones with my Copics. / Pinté los rhinestones con mis Copics.


Recipe / Receta:

Stampin Up Whisper White cardstock.

Glimmer mist – Pink bubblegum.

Twine

Stampin up Heard From The Heart stamp set.

Dies: Doily Details Collection -Paper Trey

SU! Chocolate chip ink

Hand made polymer flowers.